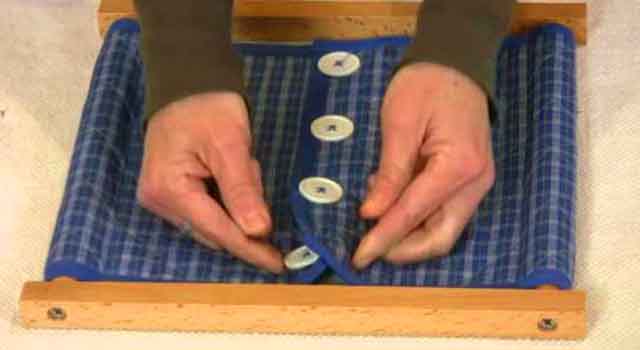
Button Frame
Invite a child to come by telling them you have something to show them. Have the child bring the appropriate dressing frame and have them place it on a specific spot on the table you will be working at. Have the child sit down first, and then you sit down. Tell the child that you will be showing him how unbutton and button. Give the names of each part.
Unbuttoning
Pinch the right side of the button with your right thumb and forefinger. Pinch the material directly to the left of the button with your left thumb and forefinger. Drag the material to the left to create a hole. Tilt the button down to the left. Begin pushing the button through the buttonhole. Release your left fingers. Push the left side of the button through the buttonhole with your left thumb and forefinger. Release your right fingers and pinch the material. Turn the fabric clockwise to allow the button to go all the way through the buttonhole. .Pause to let the child see that the button is now ‘free’. Release your left fingers. Carefully place the material over the button and remove your right fingers. Repeat with the other four buttons. Open the right door fully, and then the left. Close the flaps starting with the left flap and then the right one.
Buttoning
Squeeze the left side of the button with your left thumb and forefinger. Pinch the fabric just to the left of the buttonhole with your right thumb and forefinger. Slide the button into the center of the buttonhole. Pull off material with right fingers. Press the right side of the button that comes out of the hole. Release your left fingers. Pinch the fabric to the left of the buttonhole. Pull the fabric to the left and pull the button to the right until it is all the way through the hole. Remove the left fingers and then the right. Repeat with the other four buttons.

